You’ve probably used the Snipping Tool to quickly grab a screenshot—maybe of an error message, a funny meme, or a receipt you needed to save. But what if we told you that this humble Windows utility is far more powerful than most users realize? Far from being just a basic screen-capture app, the modern Snipping Tool is a stealthy productivity powerhouse packed with features that rival third-party tools. Whether you’re a student, designer, remote worker, or IT professional, mastering the Snipping Tool can save you time, streamline workflows, and even boost your digital communication. This guide dives deep into every hidden trick, shortcut, and advanced feature—so you’ll never look at screenshots the same way again.
Why the Snipping Tool Deserves Your Respect
Let’s be honest: for years, the Snipping Tool was seen as a clunky, outdated relic. But Microsoft has quietly transformed it into one of the most underrated tools in Windows 10 and 11. With seamless integration, real-time annotation, cloud sharing, and even delayed captures, it’s evolved into a Swiss Army knife for visual communication.
Unlike bulky screen recorders or subscription-based screenshot apps, the Snipping Tool is free, lightweight, and always available. It doesn’t require installation, runs instantly, and works flawlessly across devices. Plus, it’s deeply integrated with Windows Ink, OneDrive, and the clipboard—making it perfect for quick edits, annotations, and sharing on the fly.
Whether you’re capturing a full webpage, annotating a design mockup, or creating step-by-step tutorials, the Snipping Tool handles it all—often faster and cleaner than alternatives like Snagit or Lightshot.
How to Access the Snipping Tool Like a Pro
Most people open the Snipping Tool by searching for it in the Start menu. But power users know there are faster, smarter ways to launch it instantly.
- Keyboard Shortcut (Fastest Method): Press Windows Key + Shift + S. This instantly activates the snipping bar at the top of your screen, letting you choose your capture mode without opening the app.
- Quick Access from Taskbar: Right-click the taskbar, select “Taskbar settings,” and enable “Use the PrtScn button to open screen snipping.” Now, pressing the Print Screen key launches the snipping interface directly.
- Pin to Start or Taskbar: Search for “Snipping Tool,” right-click it, and choose “Pin to Start” or “Pin to taskbar” for one-click access.
- Run Command: Press Win + R, type
snippingtool, and hit Enter.
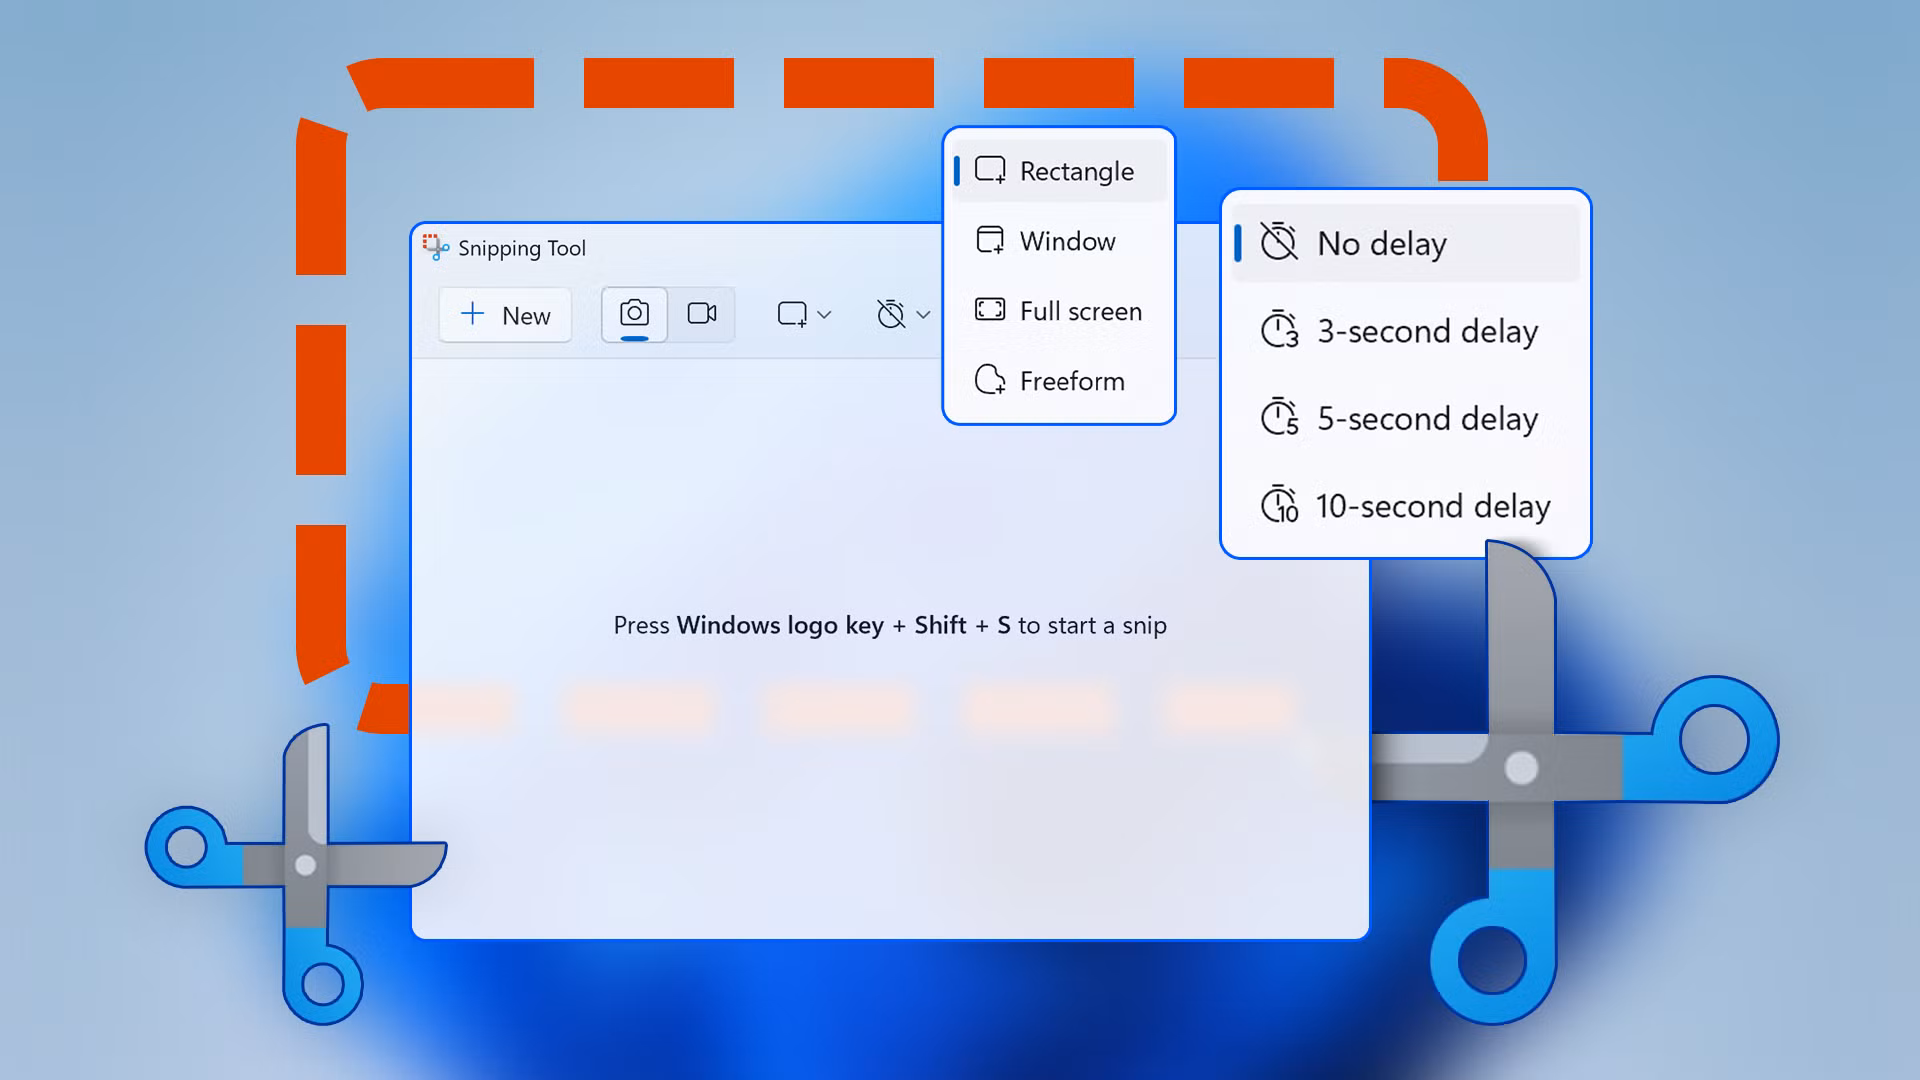
Once launched, you’ll see four snipping modes—each tailored for different use cases. Let’s break them down.
Master the Four Snipping Modes
1. Rectangular Snip
The default and most commonly used mode. Click and drag to select any rectangular area on your screen. Perfect for capturing buttons, forms, or specific sections of a webpage. Ideal for quick documentation or highlighting key info.
2. Free-form Snip
Draw any shape with your mouse or touchscreen to capture irregular areas. Great for circling a diagram, isolating a logo, or grabbing a curved UI element. Use this when precision matters more than geometry.
3. Window Snip
Click on any open window to capture it entirely—including borders, title bars, and shadows. Automatically excludes the desktop background, giving you a clean, professional-looking screenshot. Perfect for sharing app interfaces or software demos.
4. Full-screen Snip
Instantly captures your entire display. Useful for saving full web pages, presentations, or multi-window layouts. Combine with delay timers (see below) for complex setups.
Each mode opens in the Snipping Tool editor, where you can annotate, save, copy, or share your capture instantly.
Hidden Features That Make the Snipping Tool a Powerhouse
Beyond basic screenshots, the Snipping Tool includes advanced features that most users never discover. Here’s how to unlock its full potential.
Delayed Capture (Timer Snip)
Need to capture a dropdown menu, tooltip, or context menu that disappears when you click elsewhere? The delay feature is your secret weapon.
- Open the Snipping Tool and click Delay.
- Choose 3 or 10 seconds.
- Click New, then use the countdown to set up your screen.
This is invaluable for creating tutorials, recording software behavior, or capturing transient UI elements.
Instant Annotation with Windows Ink
After taking a snip, the editor opens with a built-in pen, highlighter, and eraser. Use a stylus or mouse to:
- Circle errors or important details
- Add arrows and text labels
- Blur sensitive information (like passwords or emails)
- Highlight key sections in yellow or red
Annotations are saved directly with the image—no need for external editors. Perfect for feedback, training materials, or client communication.
Auto-Save and Clipboard Integration
Every snip is automatically copied to your clipboard. Paste it directly into emails, Word docs, Slack, or PowerPoint with Ctrl + V. No saving required for quick sharing.
You can also choose to auto-save snips to a folder. Go to File > Options > Save As and set a default location. Combine this with OneDrive for cloud backup and access across devices.
Share Directly from the Editor
Click the Share button in the editor to send your snip via email, Teams, WhatsApp, or social media—without leaving the app. Great for remote teams or quick client updates.
Advanced Tips for Power Users
Ready to level up? These pro tips will turn you into a Snipping Tool ninja.
Use It for Quick Image Editing
Need to crop a photo, remove a background element, or isolate a product image? The Snipping Tool can do basic edits faster than opening Photoshop.
- Take a snip of the image.
- Use the pen tool to mark areas to remove.
- Save as PNG for transparency (if needed).
- Combine with Paint 3D for advanced masking.
While not a replacement for professional tools, it’s perfect for quick fixes.
Create Step-by-Step Tutorials
Teaching someone how to use software? Use the Snipping Tool to build visual guides:
- Capture each step with Window or Rectangular Snip.
- Annotate with numbers, arrows, and callouts.
- Save as a PDF or compile into a PowerPoint.
This method is clearer and more engaging than text-only instructions.
Blur Sensitive Data Instantly
Sharing a screenshot with personal info? Use the pen tool with a solid color (like black or gray) to cover names, emails, or account numbers. No need for external blur tools.
Combine with Snip & Sketch (Windows 10/11)
In newer Windows versions, the Snipping Tool merges with Snip & Sketch, offering even more features:
- Touch-friendly interface
- Improved annotation tools
- Integration with Windows Ink Workspace
- Option to open snips in Paint 3D
Access it via Win + Shift + S or the Action Center.
Snipping Tool vs. Alternatives: Why It Wins
You might be wondering: why use the Snipping Tool when apps like Lightshot, Greenshot, or Snagit exist? Here’s why it often comes out on top:
| Feature | Snipping Tool | Third-Party Apps |
|---|---|---|
| Cost | Free (built into Windows) | Often paid or ad-supported |
| Speed | Instant launch, no install | Requires download and setup |
| Integration | Works with clipboard, OneDrive, Office | Limited or none |
| Privacy | No data collection | Some track usage or upload images |
| Updates | Automatically updated with Windows | Manual updates required |
For most users, the Snipping Tool offers the best balance of speed, simplicity, and functionality—without compromising privacy or performance.
Common Mistakes and How to Avoid Them
Even power users make errors. Here are the most common pitfalls and how to dodge them:
- Forgetting to save: Always check if your snip is saved. Use auto-save or manually save after editing.
- Using the wrong mode: Don’t use Free-form for clean rectangles—use Rectangular Snip instead.
- Ignoring file format: Save as PNG for quality (especially with text), JPEG for smaller size, or PDF for sharing.
- Not using delay for dynamic content: If a menu disappears, use the 3- or 10-second delay.
- Over-annotating: Keep notes clear and minimal. Too much markup distracts from the message.
Key Takeaways
- The Snipping Tool is far more powerful than its reputation suggests—packed with annotation, delay, and sharing features.
- Use Win + Shift + S for instant access and choose from four snipping modes.
- Leverage delay capture for dropdowns, tooltips, and context menus.
- Annotate directly in the editor with pens, highlighters, and text.
- Auto-save to OneDrive or share instantly via email or Teams.
- It’s free, fast, and deeply integrated—making it ideal for students, professionals, and casual users alike.
FAQ: Your Snipping Tool Questions Answered
Can I edit screenshots after saving them?
Yes—but only if you reopen them in the Snipping Tool. Unfortunately, once saved, you can’t re-edit annotations unless you take a new snip. For repeated edits, keep the original file or use Paint 3D.
Does the Snipping Tool work on multiple monitors?
Absolutely. It captures any screen you’re using. Just make sure the content you want is visible on one of your displays before snipping.
Can I capture a scrolling webpage?
Not directly. The Snipping Tool only captures what’s currently on screen. For full-page screenshots, use your browser’s built-in tool (Chrome: Ctrl + Shift + I > Ctrl + Shift + P > “Capture full size screenshot”) or a browser extension.
Final Thoughts: The Snipping Tool Is Your Secret Weapon
It’s easy to overlook built-in tools in favor of flashy third-party apps. But the Snipping Tool proves that sometimes, the simplest solution is the most effective. With its blend of speed, versatility, and seamless integration, it’s become an essential part of my daily workflow—and it can be for you too.
Whether you’re documenting bugs, creating training materials, or just saving a funny tweet, the Snipping Tool handles it all with quiet confidence. So the next time you need a screenshot, skip the downloads and extra steps. Just press Win + Shift + S and let the tool do the heavy lifting.
You’ll wonder how you ever worked without it.