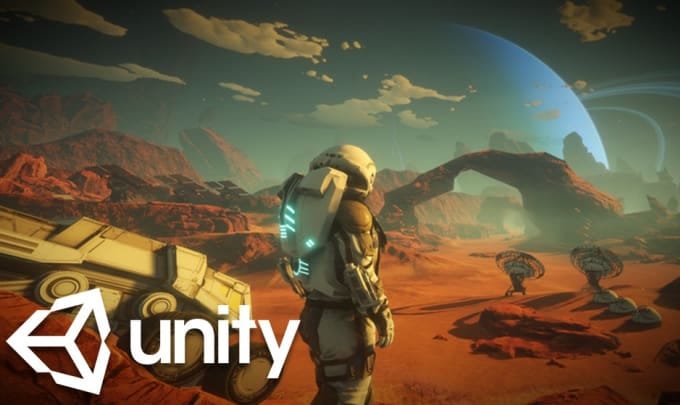
So, you want to make your own video game with Unity—and you’re ready to take that first step? Great! Whether you’re a total beginner or have dabbled in coding before, Unity is one of the most accessible and powerful game engines out there. With its intuitive interface, massive community support, and cross-platform capabilities, Unity empowers creators to bring their wildest game ideas to life—no Hollywood budget required.
In this guide, we’ll walk you through the essential first steps to making your own video game with Unity. From downloading the software to creating your first playable scene, we’ll keep it practical, jargon-light, and focused on real progress. No fluff. No overwhelming theory. Just actionable steps that get you from “I have an idea” to “I made a game” in record time.
By the end of this article, you’ll have a working prototype, a clear understanding of Unity’s core tools, and the confidence to keep building. Let’s dive in.
Why Unity? The Engine That Powers Indie Dreams
Before we jump into installation and scripting, let’s answer a common question: Why choose Unity over other game engines like Unreal or Godot?
Unity strikes the perfect balance between power and accessibility. It uses C#, a beginner-friendly programming language, and offers a visual editor that lets you design levels, place objects, and tweak settings without writing a single line of code—at least at first. Plus, Unity supports 2D, 3D, VR, and AR projects, making it incredibly versatile.
From mobile puzzle games to immersive 3D adventures, Unity has been used to create hits like Among Us, Cuphead, and Fall Guys. If these indie developers could do it, so can you.
Key Advantages of Unity for Beginners
- Free to start: Unity Personal is free for individuals and small teams earning less than $100K annually.
- Massive asset store: Thousands of free and paid assets—models, sounds, scripts—to speed up development.
- Active community: Forums, YouTube tutorials, and Discord servers full of helpful developers.
- Cross-platform export: Build once, deploy to PC, Mac, iOS, Android, consoles, and more.
Step 1: Download and Install Unity Hub
The first step to making your own video game with Unity is getting the software on your machine. But don’t just download Unity directly—start with Unity Hub.
Unity Hub is a management tool that lets you install multiple versions of Unity, organize your projects, and access learning resources. It’s the central hub for everything Unity-related.
How to Install Unity Hub
- Go to the official Unity download page.
- Click “Download Unity Hub” for your operating system (Windows, macOS, or Linux).
- Run the installer and follow the on-screen instructions.
- Launch Unity Hub once installed.
Once Unity Hub is open, you’ll see options to install Unity Editor, view projects, and access tutorials. This is your command center.
Step 2: Install the Unity Editor
Now that Unity Hub is ready, it’s time to install the actual game engine—the Unity Editor.
For beginners, we recommend installing the latest Long-Term Support (LTS) version of Unity. LTS versions are stable, well-tested, and ideal for learning and production.
Choosing the Right Version
- Unity 2022 LTS is currently the best choice for new projects.
- It includes all the latest features while maintaining stability.
- Avoid beta or tech stream versions unless you’re experimenting.
Installation Steps
- In Unity Hub, go to the “Installs” tab.
- Click “Install Editor.”
- Select “Unity 2022 LTS” from the list.
- Choose the modules you need:
- Windows Build Support (if on Windows)
- macOS Build Support (if on Mac)
- Android Build Support (for mobile games)
- Documentation (highly recommended)
- Click “Next” and wait for the installation to complete.
This may take 15–30 minutes depending on your internet speed. Grab a coffee—you’re almost ready to create!
Step 3: Create Your First Unity Project
With Unity installed, it’s time to start your first project. This is where the magic begins.
Launching a New Project
- Open Unity Hub.
- Go to the “Projects” tab.
- Click “New Project.”
- Choose a template:
- 3D Core: For 3D games (recommended for beginners).
- 2D: For 2D platformers or pixel art games.
- URP (Universal Render Pipeline): For better graphics performance.
- Name your project (e.g., “MyFirstGame”).
- Choose a save location.
- Click “Create Project.”
Unity will now load the editor. Welcome to your game development studio!
Step 4: Understanding the Unity Interface
The Unity Editor might look intimidating at first, but it’s designed to be intuitive. Let’s break down the main panels so you know where everything is.
Key Panels in Unity
- Scene View: Where you design and arrange your game world. You can move, rotate, and scale objects here.
- Game View: Shows what the player will see when the game runs. Click “Play” to test your game.
- Hierarchy: Lists all objects in the current scene. Think of it as your game’s object family tree.
- Project Window: Contains all your assets—scripts, models, sounds, and prefabs.
- Inspector: Shows properties of the selected object. Change position, size, color, and more here.
Take a moment to explore each panel. Hover over buttons, click around, and don’t worry—nothing will break.
Step 5: Building Your First Scene
Now for the fun part: creating your first game scene. We’ll start simple—a 3D environment with a player character and a goal.
Adding a Ground Plane
- In the Hierarchy, right-click and select 3D Object > Plane.
- This will be your ground. Rename it “Ground” in the Inspector.
- Adjust its position to (0, 0, 0) so it sits at the origin.
Adding a Player Character
- Right-click in the Hierarchy and select 3D Object > Capsule.
- Rename it “Player.”
- Move it above the ground using the transform tools (the arrows in the Scene view).
- Set its position to (0, 1, 0) so it floats just above the ground.
Adding a Goal Object
- Create another 3D object—this time, a Cube.
- Rename it “Goal.”
- Move it to (5, 0.5, 0) so it’s a few units away from the player.
- Change its color in the Inspector by adding a Material (we’ll cover this next).
Now you have a basic scene: a player, a ground, and a goal. Time to make it interactive.
Step 6: Adding Simple Movement with C#
To make your player move, you’ll need to write a bit of code. Don’t worry—it’s easier than it sounds.
Creating a Script
- In the Project window, right-click and select Create > C# Script.
- Name it “PlayerMovement.”
- Double-click the script to open it in your code editor (Visual Studio or VS Code).
Writing the Movement Code
Replace the default code with this simple script:
using UnityEngine;

public class PlayerMovement : MonoBehaviour
{
    public float speed = 5f;

    void Update()
    {
        float moveX = Input.GetAxis("Horizontal") * speed * Time.deltaTime;
        float moveZ = Input.GetAxis("Vertical") * speed * Time.deltaTime;

        transform.Translate(moveX, 0, moveZ);
    }
}
This script reads keyboard input (WASD or arrow keys) and moves the player accordingly. The Time.deltaTime ensures smooth movement across different frame rates.
Attaching the Script
- Drag the “PlayerMovement” script from the Project window onto the “Player” object in the Hierarchy.
- You’ll see the script appear in the Inspector under “Player (Script).”
- Click the “Play” button in the top center of the editor.
Use the arrow keys or WASD to move your capsule around the scene. Congratulations—you’ve just created interactive gameplay!
Step 7: Adding a Win Condition
Every game needs a goal. Let’s make it so the player wins when they touch the goal cube.
Creating a Trigger Script
- Create a new C# script called “GoalTrigger.”
- Open it and replace the code with:
using UnityEngine;

public class GoalTrigger : MonoBehaviour
{
    void OnTriggerEnter(Collider other)
    {
        if (other.CompareTag("Player"))
        {
            Debug.Log("You Win!");
            // Optional: Add win sound, animation, or scene change
        }
    }
}
Setting Up the Trigger
- Select the “Goal” cube in the Hierarchy.
- In the Inspector, check the “Is Trigger” box under the Box Collider component.
- Drag the “GoalTrigger” script onto the Goal object.
- Make sure the Player has a Rigidbody component (add one if not).
- Tag the Player as “Player” (go to the top of the Inspector, click “Tag,” and add “Player” if needed).
Now, when you play the game and move the player into the goal, you’ll see “You Win!” in the Console window. Game mechanics in action!
Step 8: Testing and Iterating
You’ve built a basic game loop: move, reach goal, win. But the real magic happens in iteration.
Tips for Testing
- Play your game frequently—after every small change.
- Use the Console to check for errors (red messages = problems).
- Adjust values in the Inspector (like speed) to fine-tune gameplay.
- Try breaking your game—then fix it. That’s how you learn.
Next, consider adding:
- A timer
- Obstacles
- Sound effects
- A main menu
Each addition builds your skills and confidence.
Key Takeaways
- Unity is beginner-friendly: With Unity Hub and the Editor, you can start making your own video game with Unity in under an hour.
- Start small: Focus on core mechanics first—movement, interaction, win/lose conditions.
- Use C# for control: Simple scripts can add powerful functionality.
- Test early and often: Iteration is key to great game design.
- Leverage the community: Tutorials, forums, and the Asset Store are your best friends.
FAQ
Do I need to know how to code to make a game in Unity?
Not at first! You can build simple games using Unity’s visual tools and pre-made assets. However, learning basic C# will unlock far more possibilities and is highly recommended as you progress.
Can I publish my Unity game for free?
Yes! Unity Personal is free to use, and you can publish your game on platforms like itch.io, Game Jolt, or even the Google Play Store and App Store without paying Unity anything—as long as your revenue stays under $100K per year.
How long does it take to make a simple game in Unity?
A basic prototype can be made in a few hours. A polished, publishable game might take weeks or months, depending on scope. The key is consistent progress—even 30 minutes a day adds up.
Final Thoughts
Making your own video game with Unity doesn’t require a degree in computer science or a team of developers. It starts with curiosity, a willingness to learn, and the courage to click “New Project.”
You’ve now taken the first steps: installing Unity, creating a scene, adding movement, and implementing a win condition. That’s more than most aspiring developers ever do.
So keep going. Add more levels. Try 2D. Experiment with physics. Share your game online. The journey of a game developer begins with a single prototype—and yours is already underway.
Now go make something awesome.